Creating an Oracle ADF Application
An enterprise application project ties together one or more J2EE modules, including application client modules, EJB modules, Connector modules, or Web modules.
To create a new Oracle ADF Application:
-
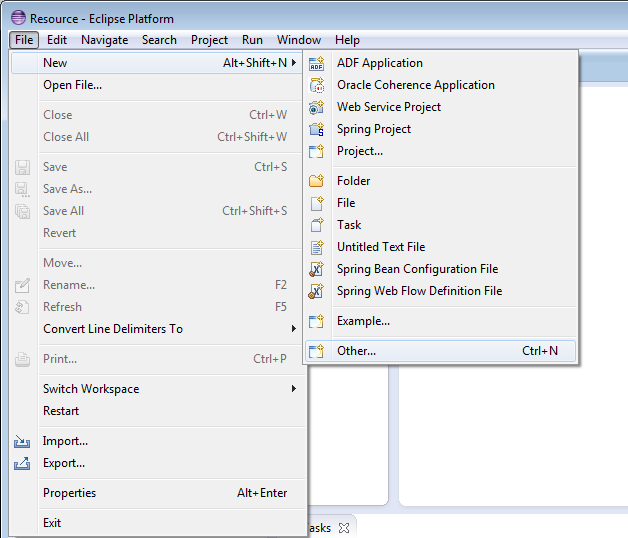
To start working, from the main menu select File > New > Other, as shown in Figure: Options on the File Menu.
You could choose ADF Application directly, but by selecting Other you can see the other options available.
-
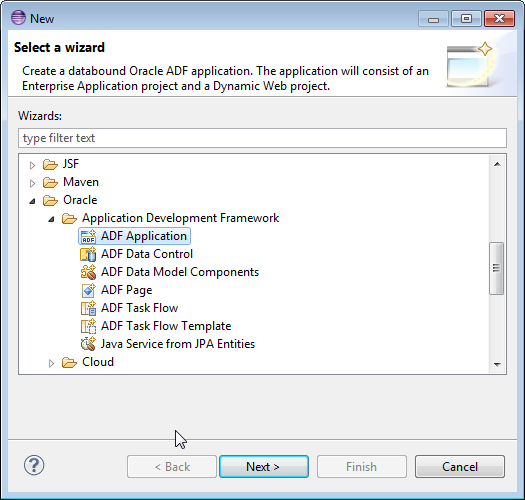
In the New wizard, expand Oracle then Application Development Framework and from the list of available Oracle templates, select ADF Application, as shown in Figure: New Wizard.
Click Next.
-
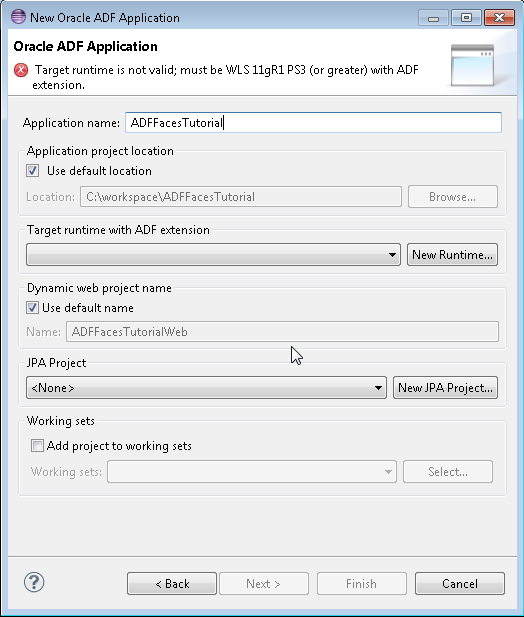
In the New Oracle ADF Application page, enter
ADFFacesTutorialas the Application name, as shown in Figure: New Oracle ADF Application Dialog. -
Click New Runtime to set WebLogic Runtime environment.
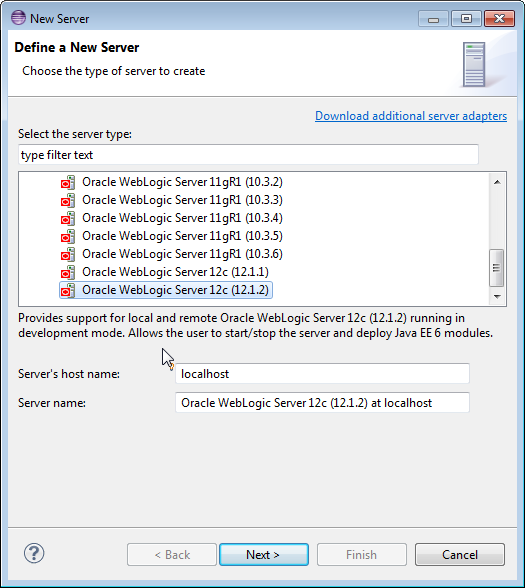
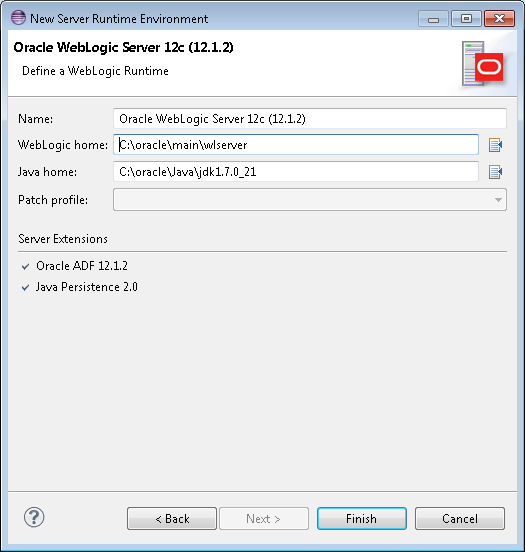
In the New Server Runtime environment expand Oracle and choose Oracle Weblogic Server 12c (12.1.3), as shown in Figure: New Server Runtime Dialog.
Click Next.
-
In the server dialog, shown in Figure: New Server Runtime Environment Dialog, click Browse
 next to the WebLogic home field and browse to the location of the running Oracle WebLogic Server.
The IDE validates the WebLogic home to ensure that there is a running instance of WebLogic Server with a properly configured ADF Runtime. It displays the location of the Java home and lists relevant server extensions.
Ensure that the server extension Oracle ADF 12.1.3 is listed. If it is not listed, consider installing a full install of Oracle Weblogic Server 12c (12.1.3) from the Oracle WebLogic Server page at the Oracle Technology Network (
http://www.oracle.com/technetwork/middleware/weblogic).Click Finish.
-
In the New Oracle ADF wizard click Finish.
-
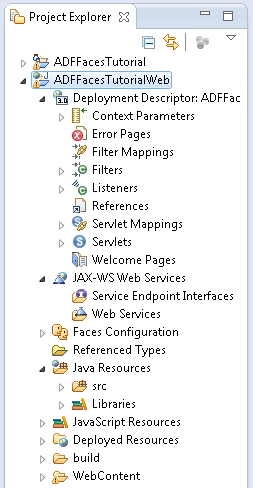
The IDE creates two projects, an Enterprise Application Project (EAR project in Eclipse) called
ADFFacesTutorialand a Dynamic Web Project calledADFFAcesTutorialWeb. The projects are listed in the Project Explorer, as shown in Figure: New Projects in Project Explorer. -
Expand the nodes of the
ADFFacesTutorialproject to review the default environment created for an EAR project. -
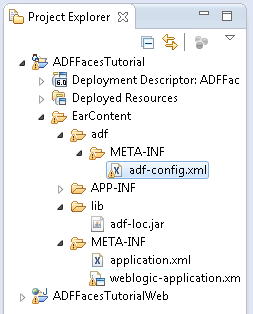
Double-click
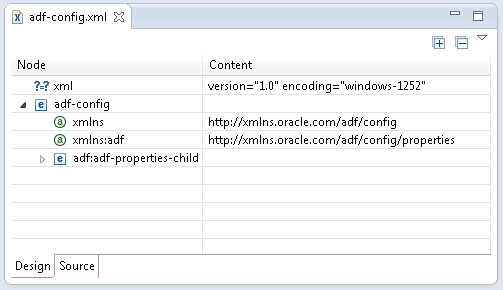
adf-config.xml, shown in Figure: adf-config.xml in Project Explorer to open it in the editor.By default the file opens in Design view, shown in Figure: adf-config.xml in Editor.
You can change to Source view by clicking the Source tab on the editor.
-
Note that the ADF library
adf-loc.jarhas been added to your project.Open and examine the configuration file
application.xml.Open the
weblogic-application.xml. Notice the shared libraries (adf.oracle.domain). -
Expand the nodes of the
ADFFacesTutorialWebproject, shown in Figure: Dynamic Web Project in Project Explorer, to review the default environment created for a Web project. -
Expand the WebContentnode then the WEB-INF node and double-click
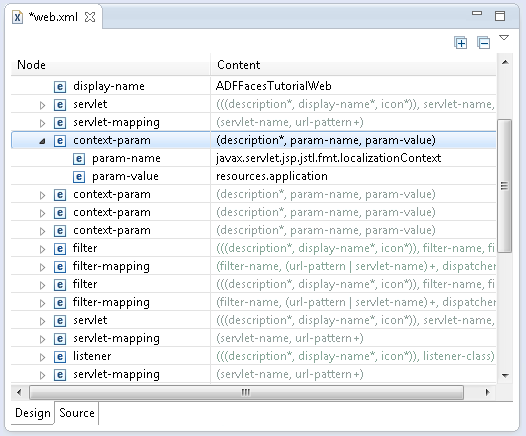
web.xmlto open the file in the editor, as shows in Figure: web.xml in Editor. Click on the nodes to show their contents. Notice theresources.applicationreference to a resource bundle file usable for internationalizing applications. -
Open the Java Resources, src, and resources nodes and double-click
application.propertiesto open it and review the content of the bundle file, as shown in Figure: application.properties Bundle File. -
Expand the WebContent and WEB-INF nodes and double-click
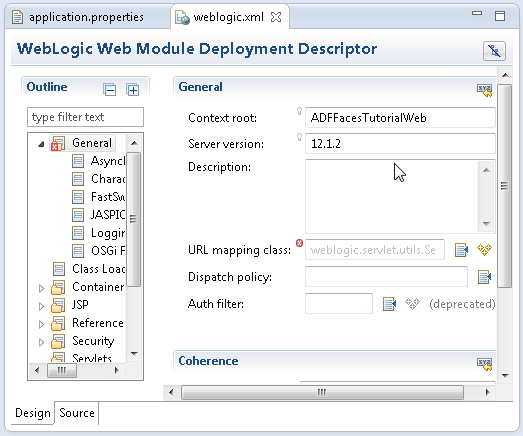
weblogic.xmlto open it in the editor, illustrated in Figure: weblogic.xml File in Editor.Expand the nodes to show the Shared Libraries. These libraries were generated when you created a new J2EE workbench.
-
Scroll down and open the
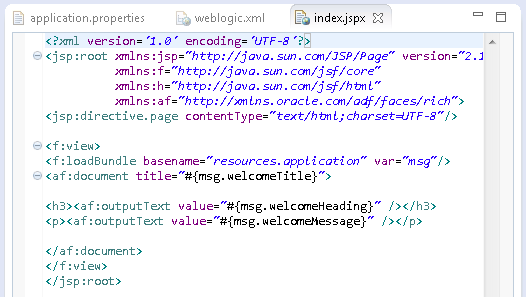
index.jspxpage that has been created by default in your Web project. Notice that, as shown in Figure: index.jspx in Design View, the page is referencing the bundle fileresources.application. -
Collapse all the open nodes in the Project Explorer then right-click in any tab and select Close All to close all open tabs of the Editor pane.
